
Changing the Battery in a Freelander 2
When LRLife member Darren tried to swap his key fob battery in his 2009 Freelander 2 he found it wasn’t as straight forward as he thought.
Words – Darren Blake – Pictures Darren Blake & Ian M. Garner
First of all don’t believe everything ChatGPT tells you.
Do your own research. I found it great for research for computer coding / programming, but it was really insistent that this battery was a simple pop out item on a spring clip. Which it wasn’t. On my model year Freelander 2 the battery is actually soldered through the circuit board.
The metal tab below is attached to the battery (probably micro spot welded). There is one tab on both sides that make up the electrical terminals through the green circuit board.
The battery is pushed into the black plastic holder
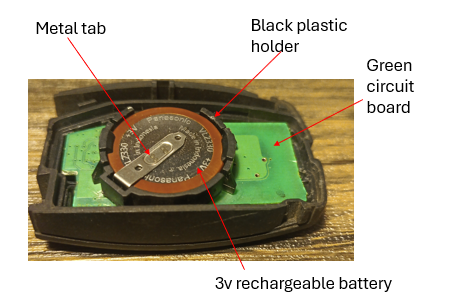
Above – This photo shows key fob open with actually my new battery in place
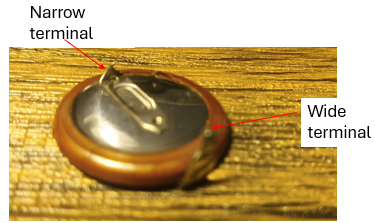
Below – The Reverse side of my old battery removed from the black plastic housing
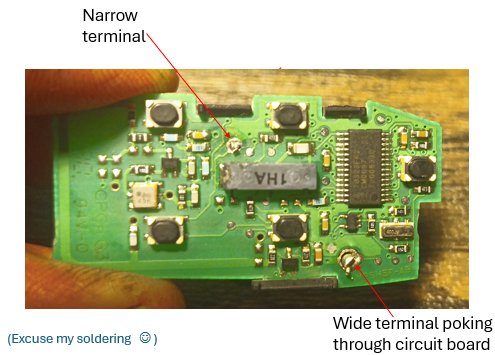
Above – The other side of the circuit board
High level process
- Open key fob, not as easy as it sounds if original Land Rover supply you have to cut it open.
2. Remove the circuit board assembly. It simply pops out with a small flat ended screwdriver.
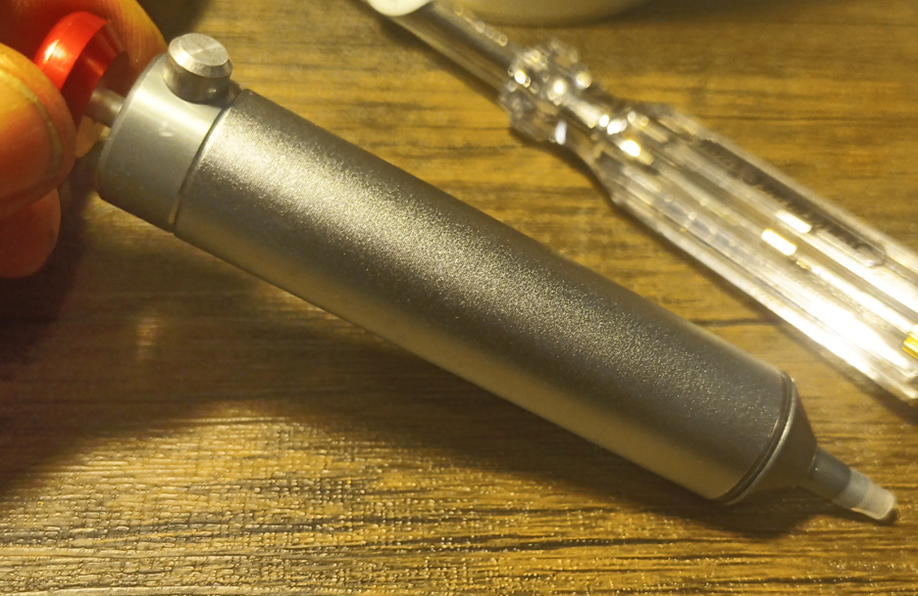
3. De-solder the wide and narrow tabs. It is very fiddly. Use a soldering iron to get the solder hot and then suck it out with a special solder sucker below from Amazon.
Below – My Solder Sucker courtesy of Amazon – Other online retails are applicable. You push the red nob in. When you are ready to suck up the hot solder. Place the plastic replaceable end over the solder and push the side nob which quickly retracts a piston in the sucker. It sucks up a small amount of solder into the plastic tube which can be removed, cleaned and reassembled to the sucker.
4. Once the tabs are free of solder prize out the battery with a flat end screwdriver. Getting the battery out of the black plastic holder is a bit tricky as well as it holds the battery quite tight.
5. It may be necessary to clean the holes left in the circuit board with a pin to ensure the new battery will insert correctly
6. Insert your new battery taking care not to bend or break the small metal terminals
7. Test the key fob, mine worked first time even without the battery terminals soldered in.
Note : Even though the battery was removed the fob didn’t need re-coding, it just worked fine…