Its all about timing
Rich Trusson puts his comedy genius to one side to tackle Paddington’s timing issues.
Words / Pictures – Rich Trusson
- Bill: I say, I say, I say! What is the secret of great comedy?
- Ben: I don’t know. What is the secr…
- Bill: Timing!
- Ben: 😒
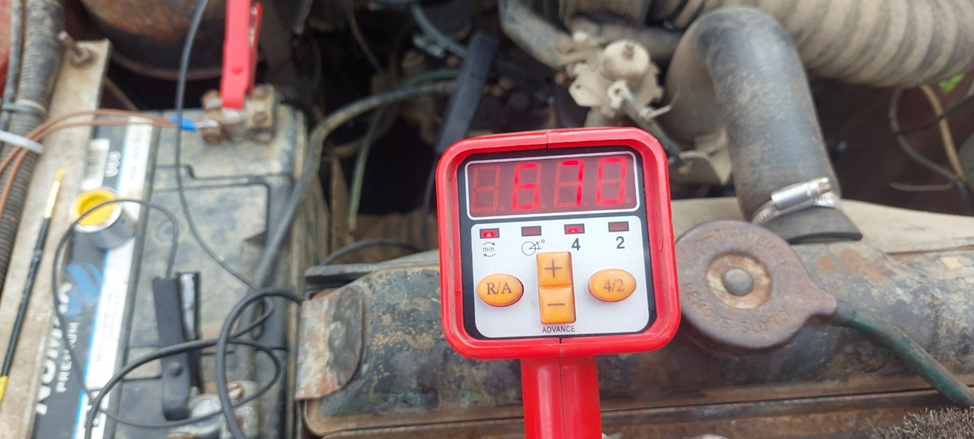
We were recently, very generously, gifted an Accuspark SP8000 timing light. Now I recall back in the day a timing strobe was a very simple thing connected to the number one spark plug and was just a bulb. The SP8000 is not ‘just a bulb’ but a very capable device with a number of different settings which are all targeted at helping you set the timing on 2 or 4 cylinder engines. Depending on the engine setup governs which features are used and required.
At the start of summer we had had Paddingtons ignition and fuelling looked at, the red Series III. Paddington had started back firing quite badly and running rough. One of the Land Rover Life members who is way more knowledgeable in these things than us and, at the time, had all the kit agreed to take a look. When we get him back after the ‘laying on of hands’ he was much better and ran well – so I was not expecting the timing to be out. The aim of the exercise was to learn how to use the timing light rather than anything else.
So first things first, work out how to use the basic functionality to measure the timing. To do this two things had to happen
- We needed to work out how to connect the light and what all the buttons did
- We needed to know what the timing should be, 0 degrees before top dead centre, 3 degrees or 6 degrees before top dead centre.
- We needed to find the timing marks (if it had any!)
Ok, OK… there were three things we needed to know ( …I’m expecting the Spanish inquisition to burst through the doors at any moment! 😉 )
Below – Before tackling this job ensure you have your Airfix paint at the ready!

A quick search online led me to the user manual for the Accuspark SP8000 which I printed out. Turns out, for timing, it’s pretty simple. Connect to the battery, observing the correct polarity. Clip the sensor wire around the number one spark plug lead making sure the arrow on the clip points to the spark plug. Point at the timing marks, pull the trigger and away you go!
Once connected to the battery the SP8000 display lit up with a big 0. It was set to read the number of ‘roundy go rounds’ the engine made per minute. So as the engine was not going round this was the correct number! Starting the engine this number went up, as it should. Pressing the trigger on the gun and it strobed when the number one spark plug fired, so that was working. However, pointing it at where I hoped the timing marks were on the pulley showed this was not going to be easy, the marks were very hard to see. Were they even there? A careful check of the crank pully showed that we did have marks, but they were a bit faint. Luckily, I had some Airfix paint so selecting the bright yellow, Gloss 69 if interested, I applied a dab to the correct timing mark for the 2.5l petrol engine fitted to Paddington.
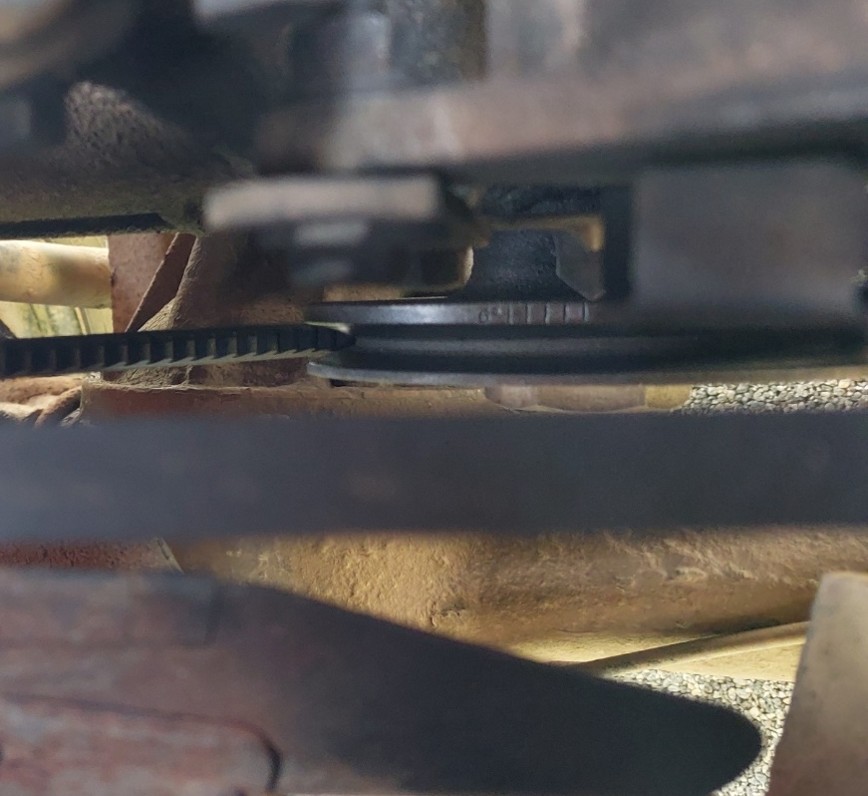
Above – You can clearly see the yellow mark under the strobe. Not in the picture above, but definitely under the strobe – Honest!
Now would it show up under the strobe? Yes it did. I don’t have pictures of the blob under the strobe, I couldn’t get my shutter timing correct! The marks, reading left to right are 6 degrees after top dead centre, 3 degrees after, 0 degrees, 3 degrees before, and 6 degrees before top dead centre. The timing indicator can be seen pointing to just after 6 degrees before top dead centre.
Was any adjustment required? Well, I had marked the position of the distributor, with the yellow paint before I started. As you can see in the picture no change, so all good.
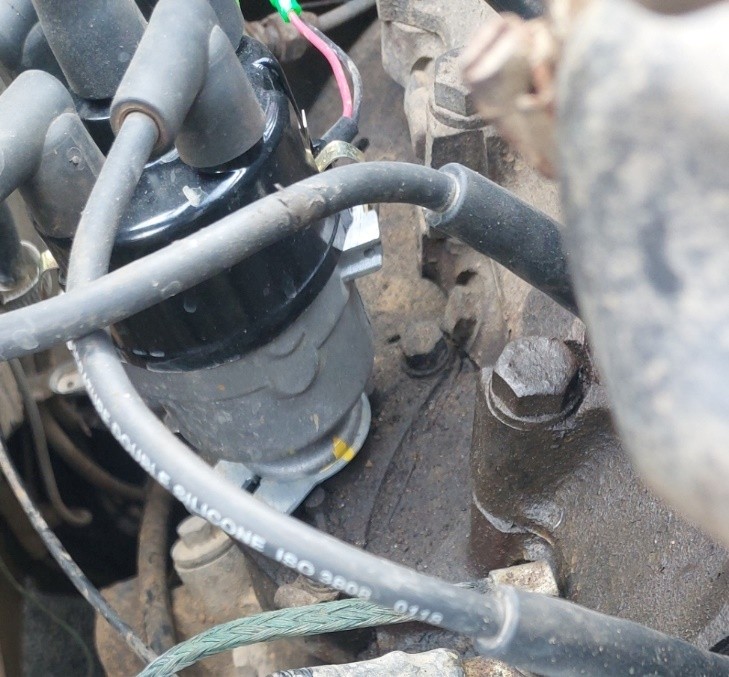
Above – More yellow paint is applied to the distributor!
A successful hour or so spent learning how to use the SP8000 so next time it, hopefully, will only take a few mins to setup and check the timing.
The picture below shows the strobe light connected when the engine is running. Red crocodile clip to the positive battery terminal and black to the negative. Just visible in the background is the black clip on the number one spark plug. A 4 cylinder engine is selected (2nd light from right). It is set to measure revolutions per min, left most light. The display is showing that the engine is turning at 670 revolutions per min which is perhaps a little slow but the engine sounds good. Because we had timing marks we did not use the angle adjustment, second light from left and the + / – buttons.